
Wheel Fitment Tool Pro – User Guide & Setup Instructions
The Wheel Fitment Tool Pro is designed to simplify the wheel selection process by allowing you to test various wheel sizes and offsets before purchasing new wheels. Proper setup ensures accurate results, helping you determine the best fitment for your vehicle while avoiding clearance issues. Follow these step-by-step instructions to set up and use the tool correctly for precise wheel positioning and fitment testing.
Preparing Your Vehicle
1. Measure Your Ride Height
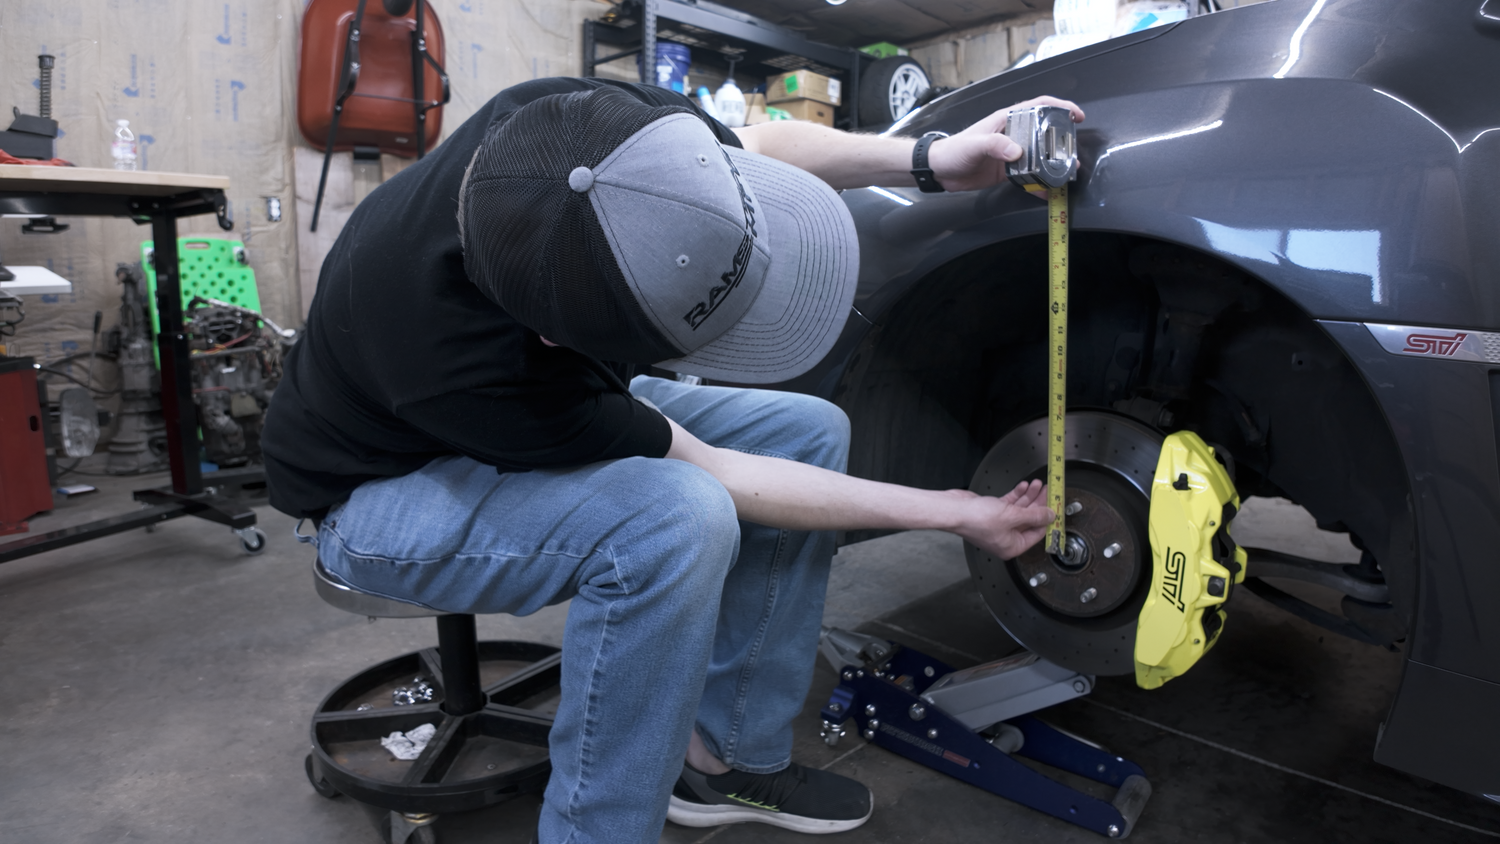
Start by measuring your ride height with the vehicle on the ground. You'll want to match this height when using the tool because your hub position and alignment will not be correct if you let the suspension hang in the air. The best way to do this is by measuring from the center of the hub to the fender while the car is on the ground.
2. Raise the Vehicle and Remove the Wheel
After measuring the ride height, lift the vehicle using a floor jack and support it with jack stands. Then, remove your current wheel. Always follow the instructions in your factory service manual (FSM) for safe floor jack and jack stand placement.
3. Raise the Suspension to Ride Height
Remember the measurement you took in Step 1? Hopefully, you wrote it down! Use a floor jack in a safe location to lift the wheel hub back up to its ride height position.
Using the Wheel Fitment Tool to Test-Fit New Wheels
1. Look Up the Wheel Specifications
Gather the diameter, width, and offset of the wheels you want to test-fit. If your wheels are measured by backspacing instead of offset, use our automatic offset-to-backspacing calculator here: [INSERT LINK].
2. Set the Tool to Match the Wheel Specifications
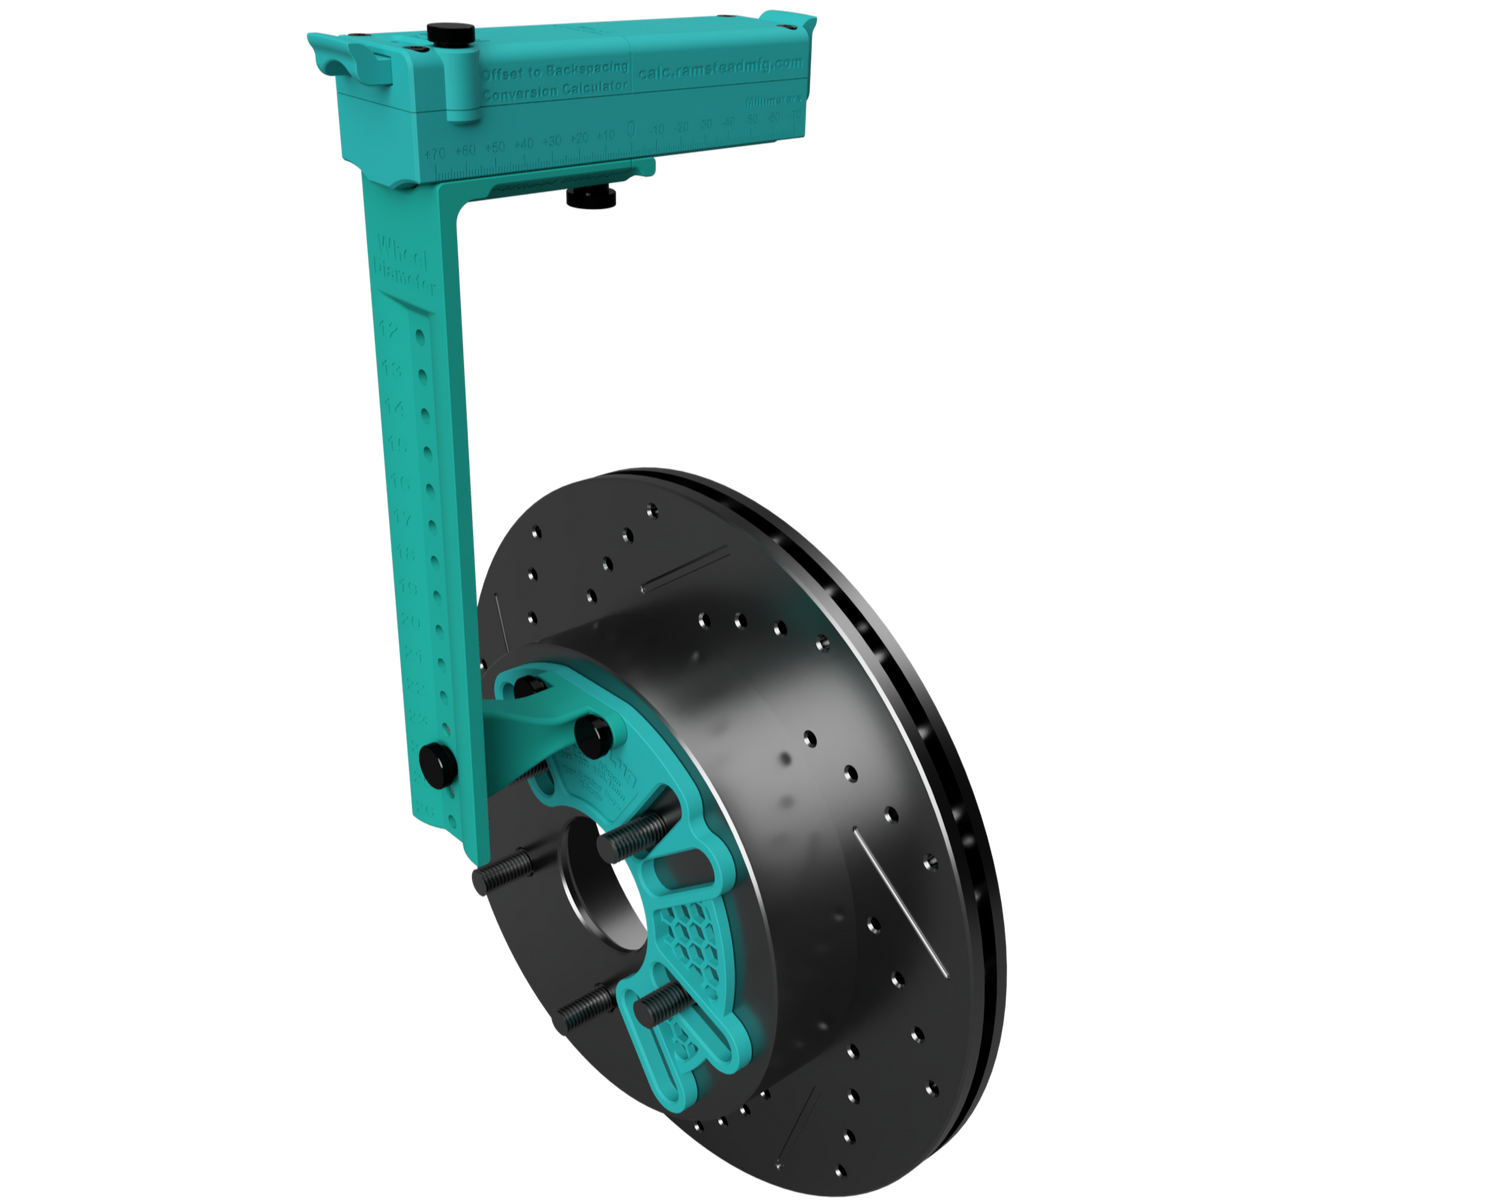
Attach the appropriate hub plate for your vehicle (4-lug, 5-lug, 6-lug, or 8-lug). Adjust the tool to the correct diameter, width, and offset.
- Use the thumb screw next to the wheel width window to lock in your width setting.
- Use the thumb screw next to the wheel offset indicator to lock in your offset setting.
Mount the tool onto the vehicle’s hub, ensuring the hub plate is centered.
3. Check Your Results
If you like the fitment, great! If not, adjust the offset to achieve the desired position, then check the offset indicator to determine the correct offset for your wheel purchase.
How to Perform a Clearance Test with the Wheel Fitment Tool
Now that the tool is set up with your desired wheel specs, you can begin clearance testing. Keep in mind that you are testing wheel fitment only, so you must allow additional room for the tire.
1. Start with the Front Driver’s Side
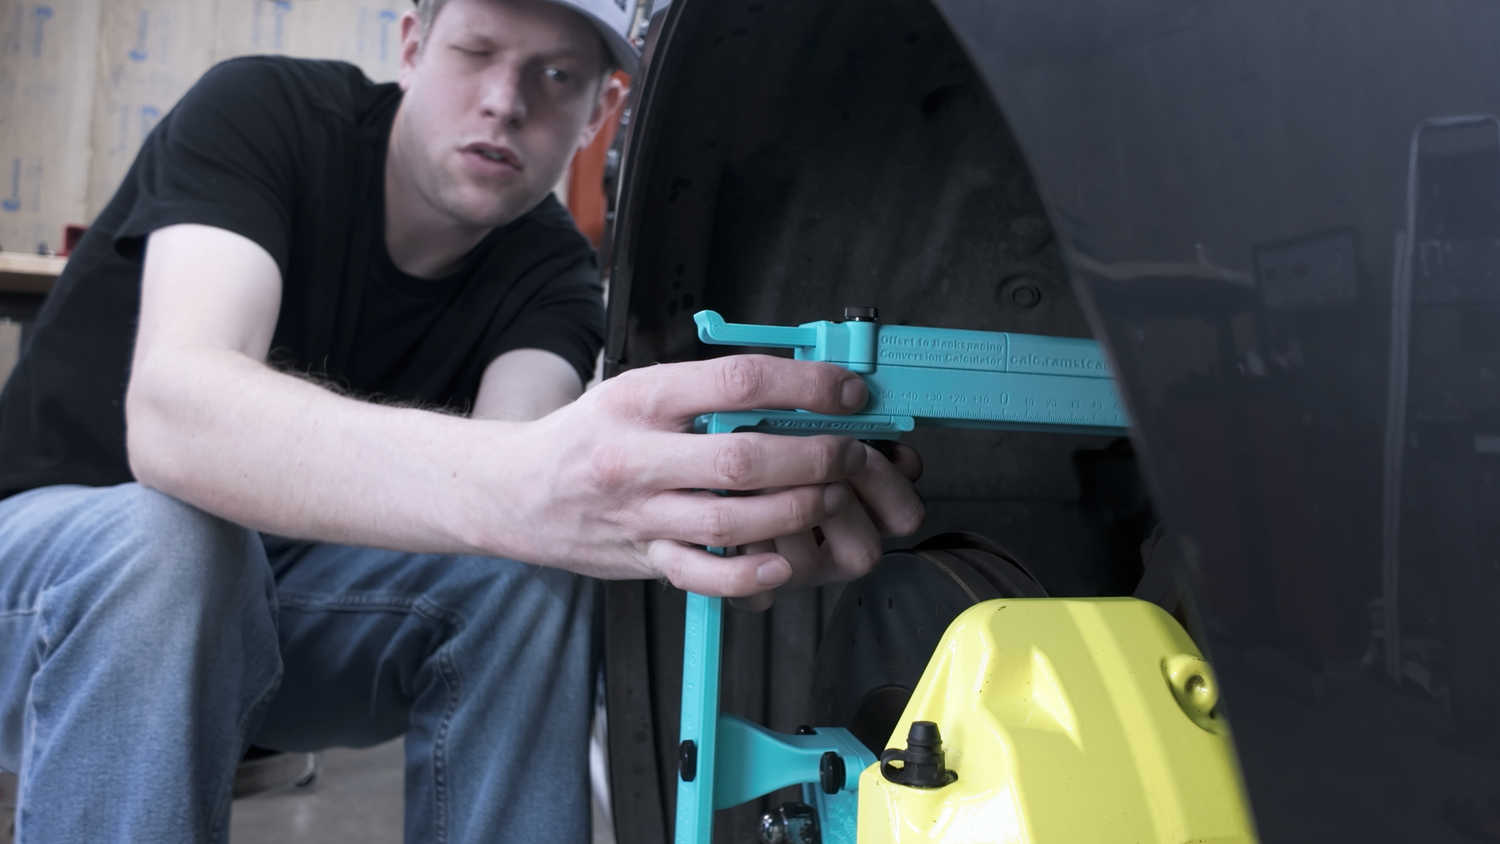
- Rotate the tool through the wheel well by turning the hub while it is mounted. For best results, rotate the hub by hand from the brake rotor or wheel studs rather than the tool itself to prevent it from shifting off-center.
- Check for interference with suspension components, fenders, brake lines, or other vehicle parts.
- If contact occurs, adjust the wheel sizing and retest.
2. Test Clearance While Steering
- Turn the steering wheel fully to the left and rotate the tool through the fender. Check for interference.
- Repeat the process with the steering wheel fully to the right.
3. Repeat the Process on the Passenger Side
4. Check Rear Wheel Clearance
- If you are running a staggered setup (different wheel sizes for the front and rear), adjust the tool for the rear wheels.
- Rotate the tool through the rear wheel well to check for clearance issues.
Using the Wheel Fitment Tool to Determine the Correct Wheel Spacer Size
If you already have your wheels and need to determine the correct wheel spacer size for optimal fitment, follow these steps:
1. Identify Your Current Wheel Specifications
For example, let's use a 17x9 +22 wheel.
2. Adjust the Tool for Your Desired Offset
Place the Wheel Fitment Tool on the hub and move the offset slider to the position that achieves the desired fitment. Then, check the offset indicator to determine your new “effective offset.”
3. Calculate the Required Spacer Size
For example, if you moved the offset to +12 for the desired fitment, you would need a 10mm spacer to compensate for the difference:
22 - 12 = 10mm spacer
Using the Wheel Fitment Tool Pro to Measure your Track Width
Preparing Your Vehicle
1. Measure Your Ride Height
Start by measuring your ride height with the vehicle on the ground. You'll want to match this height when using the tool because your hub position and alignment will not be correct if you let the suspension hang in the air. The best way to do this is by measuring from the center of the hub to the fender while the car is on the ground.
2. Raise the Vehicle and Remove the Wheel
After measuring the ride height, lift the vehicle using a floor jack and support it with jack stands. Then, remove your current wheel. Always follow the instructions in your factory service manual (FSM) for safe floor jack and jack stand placement.
3. Raise the Suspension to Ride Height
Remember the measurement you took in Step 1? Hopefully, you wrote it down! Use a floor jack in a safe location to lift the wheel hub back up to its ride height position.
Using the Wheel Fitment Tool to Test-Fit New Wheels
1. Look Up the Wheel Specifications
Gather the diameter, width, and offset of the wheels you want to test-fit. If your wheels are measured by backspacing instead of offset, use our automatic offset-to-backspacing calculator here.
2. Set the Tool to Match the Wheel Specifications
Attach the appropriate hub plate for your vehicle (4-lug, 5-lug, 6-lug, or 8-lug). Adjust the tool to the correct diameter, width, and offset.
- Use the thumb screw next to the wheel width window to lock in your width setting.
- Use the thumb screw next to the wheel offset indicator to lock in your offset setting.
Mount the tool onto the vehicle’s hub, ensuring the hub plate is centered.
3. Check Your Results
If you like the fitment, great! If not, adjust the offset to achieve the desired position, then check the offset indicator to determine the correct offset for your wheel purchase.
How to Perform a Clearance Test with the Wheel Fitment Tool
Now that the tool is set up with your desired wheel specs, you can begin clearance testing. Keep in mind that you are testing wheel fitment only, so you must allow additional room for the tire.
1. Start with the Front Driver’s Side
- Rotate the tool through the wheel well by turning the hub while it is mounted. For best results, rotate the hub by hand from the brake rotor or wheel studs rather than the tool itself to prevent it from shifting off-center.
- Check for interference with suspension components, fenders, brake lines, or other vehicle parts.
- If contact occurs, adjust the wheel sizing and retest.
2. Test Clearance While Steering
- Turn the steering wheel fully to the left and rotate the tool through the fender. Check for interference.
- Repeat the process with the steering wheel fully to the right.
3. Repeat the Process on the Passenger Side
4. Check Rear Wheel Clearance
- If you are running a staggered setup (different wheel sizes for the front and rear), adjust the tool for the rear wheels.
- Rotate the tool through the rear wheel well to check for clearance issues.
If your vehicle has large brakes, take the time to select a wheel designed for big brake clearance. Some wheel models offer low disk, mid disk, and high disk options to accommodate larger brakes. The drop center location also affects brake clearance. For example, a reverse mount wheel has the drop center positioned toward the inner flange, which often causes the most clearance issues with large brakes.
Using the Wheel Fitment Tool to Determine the Correct Wheel Spacer Size
If you already have your wheels and need to determine the correct wheel spacer size for optimal fitment, follow these steps:
1. Identify Your Current Wheel Specifications
For example, let's use a 17x9 +22 wheel.
2. Adjust the Tool for Your Desired Offset
Place the Wheel Fitment Tool on the hub and move the offset slider to the position that achieves the desired fitment. Then, check the offset indicator to determine your new “effective offset.”
3. Calculate the Required Spacer Size
For example, if you moved the offset to +12 for the desired fitment, you would need a 10mm spacer to compensate for the difference:
22 - 12 = 10mm spacer
Measuring Track Width with the Wheel Fitment Tool Pro
Measuring track width is an essential step in achieving the desired stance and performance for your vehicle. Generally speaking, a wider track width in front will promote oversteer whereas a wider track width in the rear will promote understeer. Follow these steps to accurately measure the track width using the Wheel Fitment Tool Pro:
What You’ll Need:
- Two or Four Wheel Fitment Tool Pros (depending on your preference and vehicle setup)
- Measuring Tape
Steps for Measuring Track Width:
- Set Up the Tool on the Front of the Vehicle
- Position the Tool on the Hub
- Repeat for the Rear of the Vehicle (if applicable)
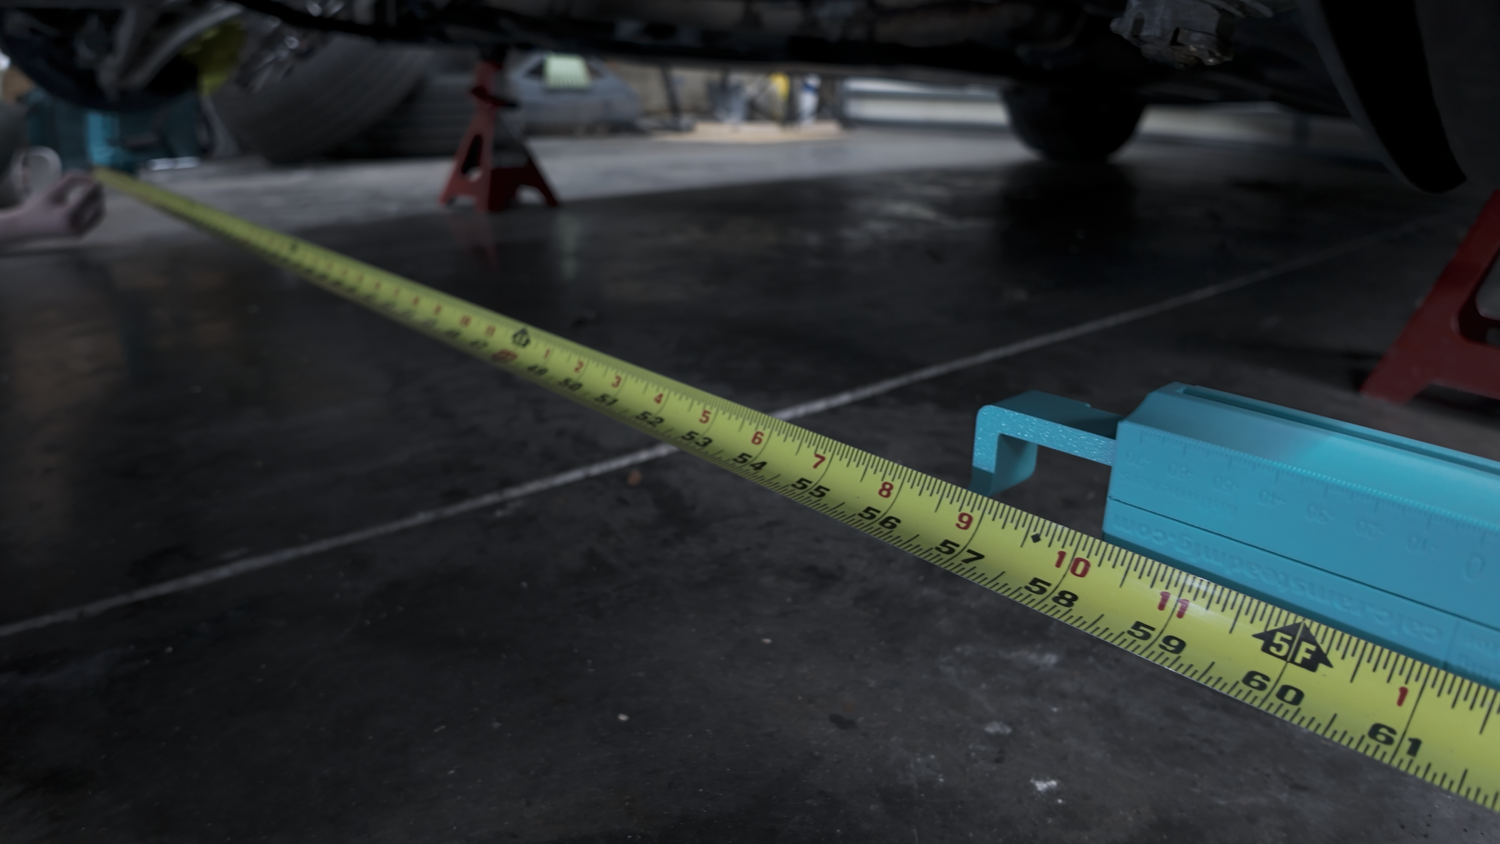
- Measure Track Width at the Front
- Measure Track Width at the Rear (if applicable)
- Finalize Your Fitment Setup
Important Notes:
- Track width is the distance between the centerlines of the left and right wheels.
- Make sure the tool is securely mounted to avoid measurement inaccuracies.
- Always check for interference with suspension components and fenders during testing.
By following these steps, you can confidently measure and adjust your vehicle's track width to optimize wheel fitment and handling characteristics!